As developers, we usually choose WordPress to design websites on our PC first. We generally install a local server (popular known as localhost) using Xampp (for Windows OS), and Mamp (for Apple OS). Yet, most of us are unaware of the proper way to bring it to a live server later on.
Even knowing is not enough, make it look identical and many features seem to be missing in the process. So, today I’m gonna give you a complete tutorial about moving a WordPress site from a local server to a live server.
Requirements
- First of all, you need a domain and hosting.
- The domain name must be properly resolved to the hosting. Changing to the hosting server’s NS Address generally resolves it. (To get assistance, contact your hosting provider)
- Permission to create MySql database and FTP Access. It is preferable to have an access to the cPanel (assuming you are using Linux-based web hosting).
- FTP client software FileZilla. You can download FileZilla from its official website.
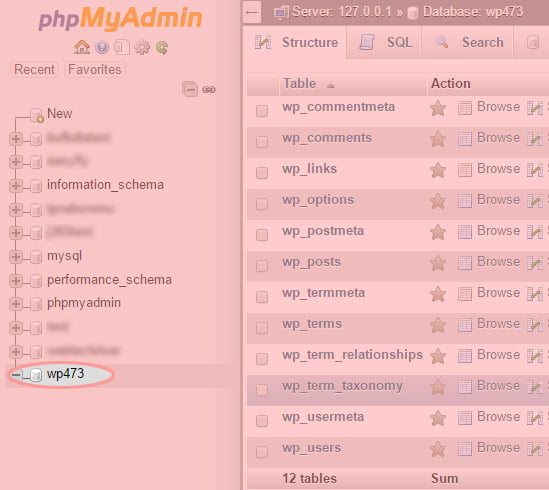
Database Export from Local Server
Since we will use your local server’s database in the live server, you need to export it to a compressed (.zip) text file. Go to the ‘phpMyAdmin’ section of your local server (http://localhost/phpmyadmin). Select your database from the list on the left side/corner. Now click on ‘Export’ like the following image.
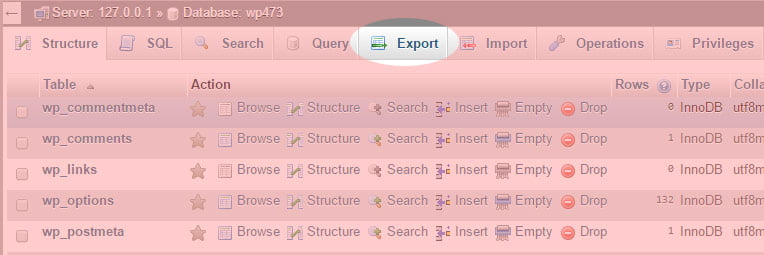
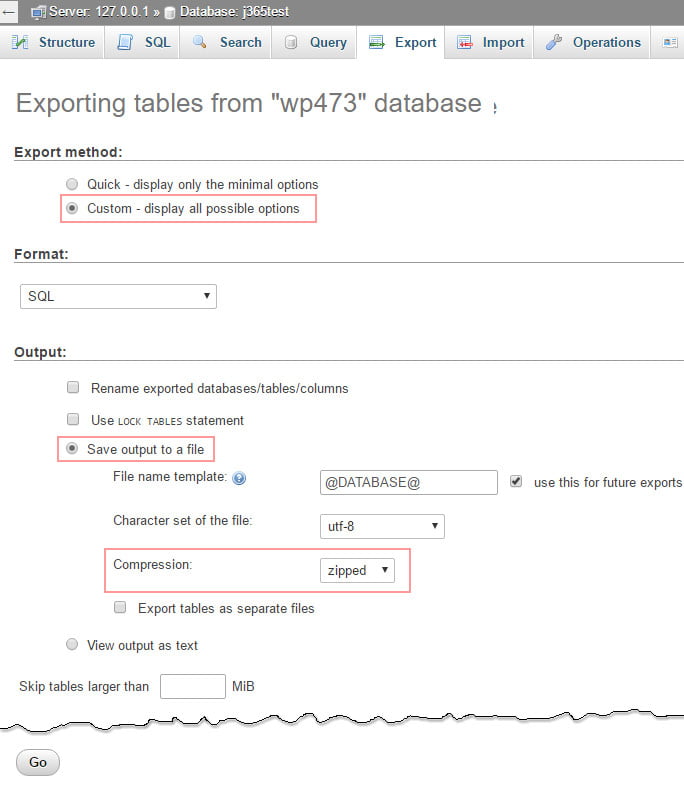
Click on the “Go” button without making any further changes. A file should be downloaded in .zip file format, save that.
WordPress Upload and Extract Files from cPanel
It takes a lot of time to upload files one by one with FTP software. So, zip all the files of your website that you have built on your local host. Then upload that .zip file with FileZilla to the root folder of the live server. Wait until uploading is complete.

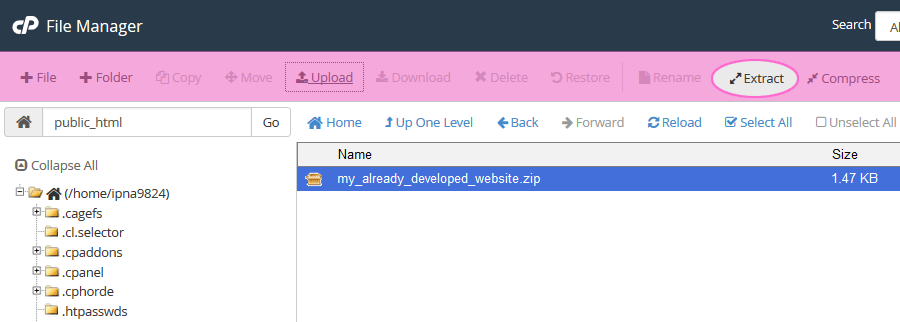
Login to your hosting cPanel. Click on the “File Manager” icon. You will be redirected to your hosting server’s file manager.
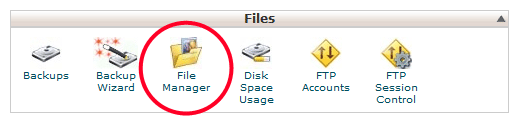
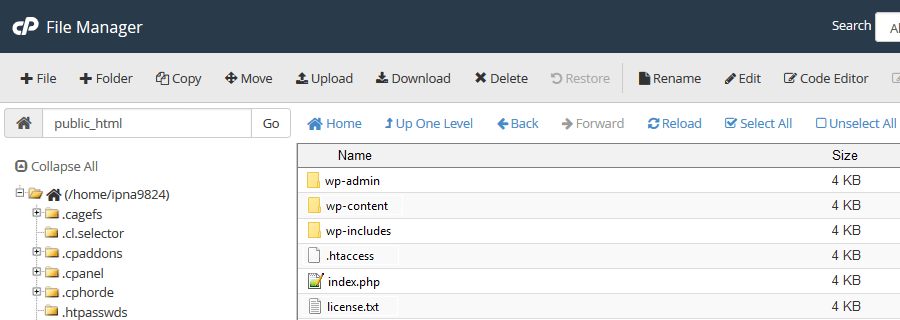
You should see your .zip file (which is the only file). Click on your .zip file and press the “Extract” button. Wait for a while. All your files will be extracted as you had on your local host.
Creating MySql Database on Live Server
Now we need to create a new database. Login to your hosting’s cPanel (hope you are already logged in), Click on MySql Database by scrolling down like the image below.

You’ll get a page like the following image:
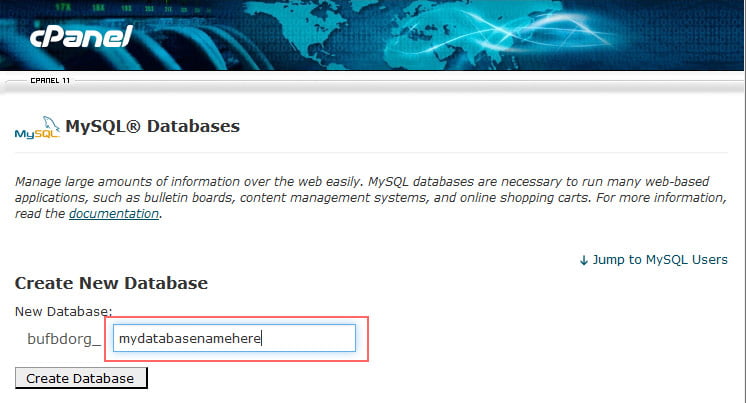
Now select a name for your newly made database and click “Create Database“.
Once done, scroll down to the “Add New User” section. Create a new database user here
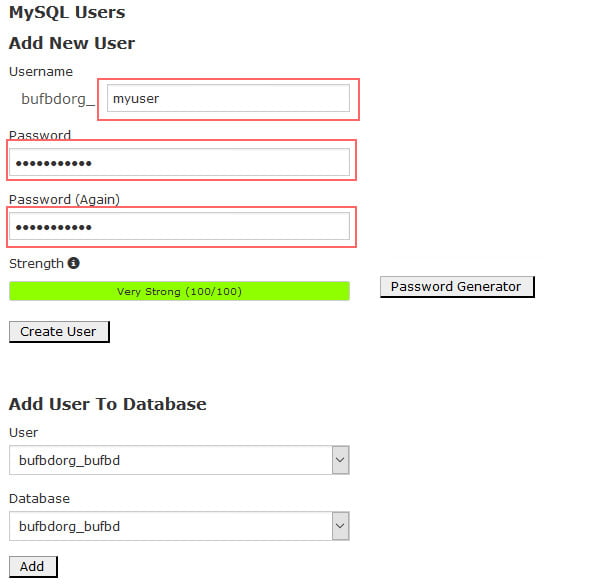
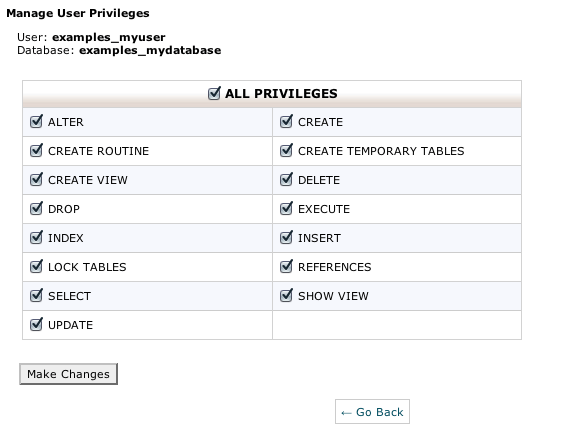
At this point, we have created a new database and a new user. Now, I shall add this user to our database and set access privileges for the user. Under the “Add User To Database” section, I shall select my user and the database from dropdown combo boxes and click on the “Add” button. This will bring me to a new page like the image below. Click on “ALL PRIVILEGES” to select all the privileges listed below and again to press the “Make Changes” button. Press the “Go Back” button at the end.
Thus I have completed making the database, and user, and adding the user to the database with appropriate access privileges to the user.
Database Import
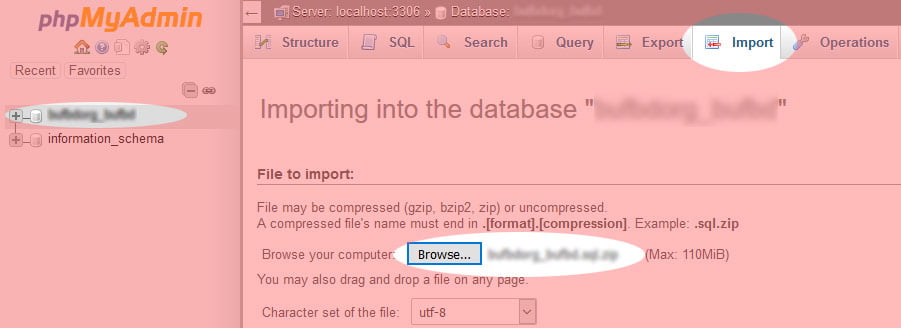
Go to cPanel’s homepage, scroll down to “phpMyAdmin” and click it. Click your new database (which you have just created) from the left section. Then click on “Import” from the Menu bar.
Now, click on the “GO” button at the bottom of the page. The database would be imported after a short while.
Changing the Website’s URL
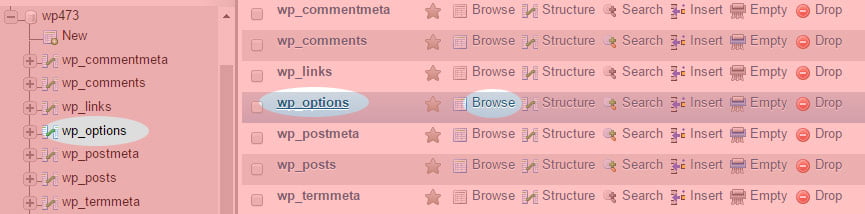
Since our previous website address was in “localhost“, we need to replace it with our new domain’s address. Open the database from phpMyadmin and browse the “wp_options” table.
You’ll get a field named “siteurl” here.

Click on the edit button of the “siteurl” field. Change your previous localhost address (http://localhost/wp473) by adding your new address (domain name, http://example.com/) here.
Pay close attention so that the URL format is right. Put the URL in the following format:
http://domain.com/
Save the record by pressing the “GO” button at the bottom of the page. This will bring us back to the listing page of the “wp_options” table. In a similar fashion, change the value of the “home” field with the correct URL, in our case, “http://domain.com/“
Database Connection
Now visit your site without any worry. You’ll see an error like this:
“Error Establishing Database Connection”
That means your site is unable to connect to the database.
To solve this problem, switch to the File Manager tab in cPanel. Find the “wp-config.php” file and open it in edit mode.
Now, change your new database setting values as the following:
define('DB_NAME', 'write-database-name-here');
define('DB_USER', 'write-username-here');
define('DB_PASSWORD', 'write-new-password-here');
define('DB_HOST', 'localhost');
[Do not change it unless your hosting company provides a new value for DB_HOST]
Permalink Rewrite
You need to rewrite your site’s permalink. Go to ‘permalink’ from Settings and click on the ‘save’ button.
Media Link Update
Most people end just right at the previous step. Consequentially, the images remain out of sight. In order to see those, you must update the image links.
Go to cPanel’s phpMyAdmin to update your post’s media link and select the database you have just imported.
Click on SQL from the top menu bar and run the following query:
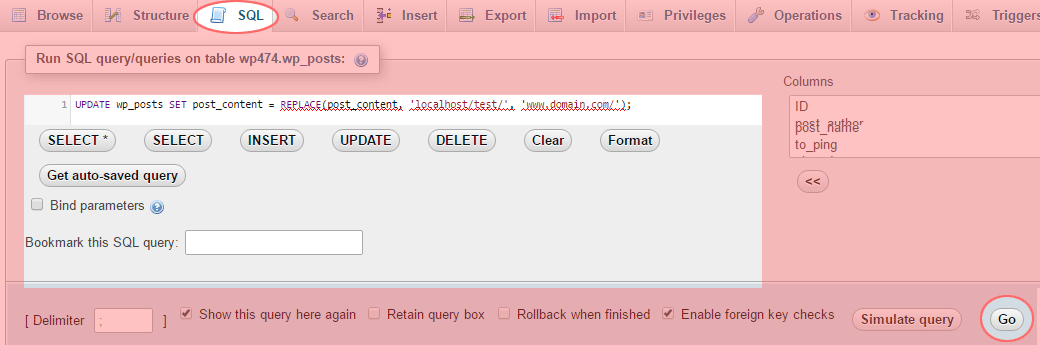
Edit the query with your local server address and your present address.
UPDATE wp_posts SET post_content = REPLACE(post_content, 'localhost/test/', 'www.domain.com/');
Congratulation! You have finally moved your WordPress site to your hosting server.
I hope that your WordPress is running as expected. I tried to explain as simply as possible. I have tried to keep everything simple, (because. it’s WordPress, thanks) and hope you will find it so.
Leave Your Comment