
When you embark on your WordPress journey, you’ll notice a mysterious time and date displayed on your website. But here’s the twist: WordPress uses UTC (Coordinated Universal Time) as its default timezone. It’s like having a global clock that doesn’t care about your local coffee shop’s opening hours.
But fear not! You can break free from the UTC matrix. Whether you’re a blogger, or developer, this tweak matters. It affects publication times, revisions, scheduled posts, and even those nifty countdown timers.
So, let’s dive into the next steps to changing the WordPress timezone.
How to Change Your WordPress Timezone
Step 1. Log in to the WordPress Dashboard.
Step 2. Click Settings in the navigation menu, then click the General link.
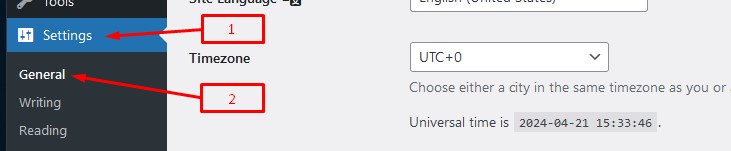
Step 3. Click the drop-down menu next to Timezone, and choose a city in your timezone, or use the manual offset options from the list.
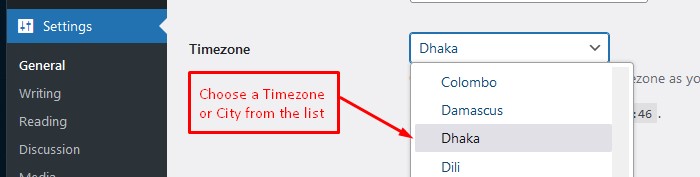
Step 4. Click the Save Changes button. You are finished when you see a “Setings Saved” info message.
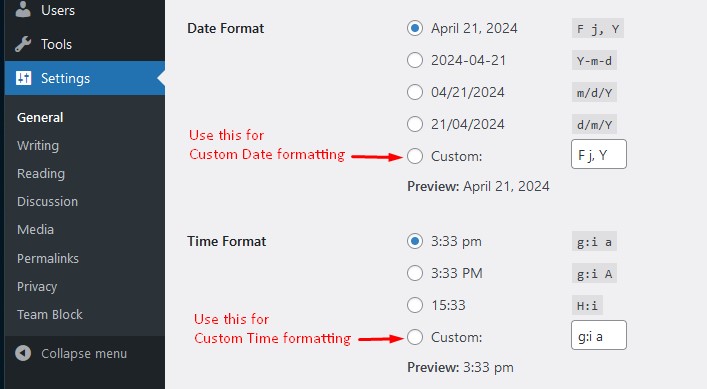
Step 5. Just below the Timezone section, there are two different sections, Date Format and Time Format. These two sections come with some pre-defined format and custom formatting option. You can use these options to format your date and time as per your liking.
Conclusion
Following the above steps, you can set up the timezone, date and time in your WordPress site correctly.
Now your scheduled posts will hit the social media precisely when you want them to. Social media auto-posters will sing your praises. And your visitors won’t wonder why your countdown timer says it’s New Year’s Eve in July.
I have made a tutorial video on this topic and posted it on WebTechRiser’s YouTube channel. If you’re comfortable with learning by watching videos, we hope you’ll feel encouraged to watch the video.
If you liked the video, please like it and consider subscribing to our channel for more web development tutorial videos.
Leave Your Comment