After setting up a WordPress site, problems can arise due to various factors. The issues may be due to PHP version changes, WordPress version upgrades, server downtime, etc. Thankfully, WordPress has its built-in debug mode.
Client sites often require professional WordPress developers to debug various issues or perform site audits. Each developer uses different types of third-party tools to solve problems.
Based on professional experience, I have shared with you here how to quickly debug or find out the possible cause or solution to a problem.
Plugin: Simple Admin Language Change
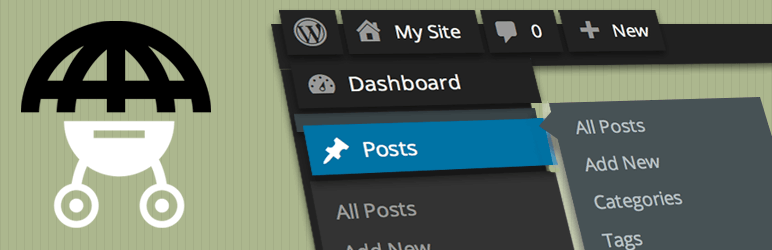
It takes time to find the required settings if the client’s website is in another language. In such cases, if any of the above plugins are installed, the language of the admin section can be switched from any other language to English in one click from Admin Bar.
Since English is a universal language, developers can quickly find the necessary settings in the admin section.
Plugin: Query Monitor
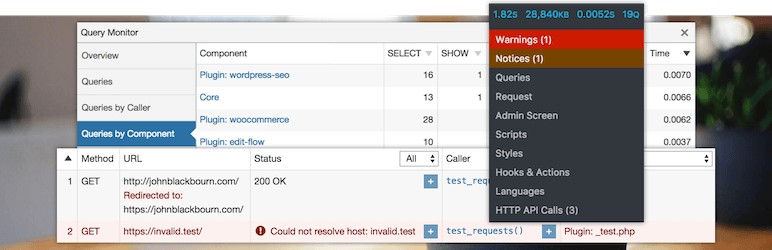
Query Monitor is a wonderful plugin! A lot of information can be found using this plugin. It has many features. In short, it is not possible to finish talking about all its features. If someone is not using this plugin, you can install it and see the features.
This plugin is a must-have plugin for debugging that every developer should try.
Some of its primary use cases are:
- If any kind of PHP Error/Warning is found on the current page, it will be red-marked with information on the Admin Bar. If you click on the Admin Bar, it is mentioned where there is an Error or Warning. So errors/warnings can be detected very quickly.
- If any Error/Warning is received from Ajax Request, it will be notified by a red mark on Admin Bar.
Check Browser Console
If it seems that the problem is likely to be a problem related to browser interaction or JavaScript, then check the browser console on the Front-end or Admin page where the problem is showing.
For example:
- If a JavaScript-based slider does not work in Font-ent, first look for the related error from the Console;
- If the next post does not appear after clicking the “Load More” button, then an error or warning can be found in the console, which can give an indication of the possible cause of the problem. This way you don’t have to spend time checking something else.
Permalink Flush
Many times visiting a single or details page of Custom Post Type will show a “404 Not Found” page. Checking the code of the plugin or theme does not reveal where the problem originates. In such a case, after flashing the permalink this problem is solved.
Although plugins programmatically flash permalinks after registering a custom post type, sometimes they don’t flash properly. So when it seems that a page is showing a “404 Not Found” page instead of content as expected, or the content is not showing at all, flashing the permalink first can get rid of this problem.
A common problem with permalinks is:
- After installing the Elementor plugin, creating a template, and going to the “View/Details” page of that template, the content often does not appear. Flushing the permalinks usually solves this problem.
Plugin: Debug Log Check by “WP Debugging”

Sometimes a feature of the site does not work as expected due to PHP version compatibility or any other reason. Then you can install this plugin.
If WP_DBUG is not added to the WordPress site’s wp-config.php file, this plugin enables debug mode upon activation, and site logs can be easily checked from the “Debug Quick Look” menu in the Admin Bar.
In this way, if there is an error or warning in any part of the site, the possible reason can be found out from where the problem is by looking at its log.
Plugin: Health Check & Troubleshooting

Even after following the above steps, you may not sometimes find the root of the problem. Then this plugin will work great!
With this plugin, you can activate the WordPress default theme of your site and “Deactivate” all other plugins with one click. You may find it interesting that this plugin deactivates installed plugins or themes for the “Admin” user only. But, front-end visitors won’t notice any effect of theme or plugin changes in the admin section.
Check the site by switching among the installed “Theme” one by one with this plugin. By seeing what kind of changes are happening on the site, you can decide if the problem is actually with the theme.
If the problem does not arise from the theme, then “Activate” the plugins one by one. Activate each plugin and check the site for issues.
This way, you can isolate the plugin causing problems on the site.
After removing the offending plugin and setting the “Troubleshoot” mode to “Disable” mode, the site reverts to its previous state. It means that themes and plugins that were previously “Active” will revert to that state.
This way, you can quickly detect which theme or plugin is causing the problem.
Plugin: Plugin Detective – Troubleshooting
It is an alternative plugin to Health Check & Troubleshooting plugin. It also works well!
Clear the Cache
Every browser manages the cache automatically. Using the cache helps previously browsed websites load faster. On the other hand, its use creates the unwanted problem of not showing new assets.
Even using the WordPress debugging plugins mentioned above, sometimes the problem cannot be tracked. In such a situation, I will check if the caching plugin is activated on the site and clear the cache. After investigating a lot, many times it is found that the site is not getting the desired results due to cache.
Make Sure That The Plugins, Themes are Updated
If there is compatibility or other problem with a plugin or theme, you have updated the theme or plugin to the latest version. Because the developers of themes and plugins constantly release new versions of plugins and themes by solving various errors or warnings.
It is also possible that the latest version has fixed the problem.
xDebug Extension
WordPress developers usually use var_dump or print_r functions for debugging. Instead of checking var_dump or print_r repeatedly on the localhost server, you should use the xDebug Extension within the IDE. It can check variable values better than var_dump or print_r.
Body Tag’s Class / WooCommerce Product’s Grid CSS Class (Optional)
While browsing any page on Frontend of a WordPress website, some of the information developers may need to know. For example:
- Whether the page I am on is the post, page, or, Custom Post Type;
- Which theme is currently active on the site;
- The ID of the post, page, or, Custom Post Type;
- “Template Type” of the page such as Archive, Single, Author, etc.;
- Whether the page is loading from a custom template file, e.g., theme-name.php, template-about-us.php;
- For more information, see the classes inside the frontend body tag;
- In addition, the following information is available from the WooCommerce product class, Product ID, Stock Status, Product Category, Product Type, Tax Info, etc.
In addition to the above information, the page’s body class and the WooCommerce product loop class provide more information that may be useful during debugging.
Conclusion
What if I have followed the method mentioned above, but my problem persists? I think the above points will help make the WordPress debugging process faster.
I just shared my debugging process. Everyone’s way of thinking and working is different. If any of you have any method or tool that you use in day-to-day work, you can share it in the comments. Other developers, including me, who will see this post, will also benefit from knowing it.
Leave Your Comment