
Beginners who install WordPress for the purpose of learning WordPress, first ask how to add more features and functionality. For this, a feature called “Plugin” is built into WordPress. There are plugins for managing events in WordPress, another type of plugin for restaurants, and again, many plugin providers market Learning Management System (LMS) plugins to host online tutorial courses.
Also, newcomers to WordPress are getting suggestions from friends, friends, online, or the WordPress community, about which plugins need to be installed after a WordPress installation.
So, it is understood that the WordPress plugin is a very powerful feature. Those who are new to WordPress must know how to install the plugin. It’s a very important thing to learn to use all the power of WordPress.
Let’s install a free WordPress Plugin
In the WordPress Plugin Directory, at the time of writing this post, there are more than 54,558 free plugins. These free plugins can be installed in two ways:
- Install from within WordPress, or,
- Download from WordPress Plugin Directory and manually install it on the WordPress website.
First, log in to your WordPress site. The login address for your WordPress site generally is,
http://my-website.com/wp-admin/
Click the “Plugins” link from the left sidebar menu.

Now click on the “Add New” button at the top of the screen.

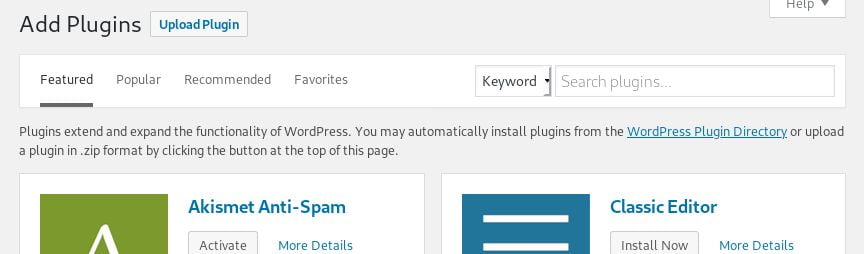
In the figure below, type the keyword of the plugin you are looking for by placing the cursor in the search box.

Shortly after pressing the “Add New” button on the Plugins screen, a new look will appear on the screen where WordPress will display Featured, Popular, Recommended, and Favorites plugins from the Plugins list.
If you want to install the “WP-Optimize-Clean, Compress, Cache” plugin, just wait for a while by typing the word “optimize” into the search box. From its plugin list, WordPress will present a list of a number of plugins it can find matching your search keywords in the form of a list, which will look like the screen below.
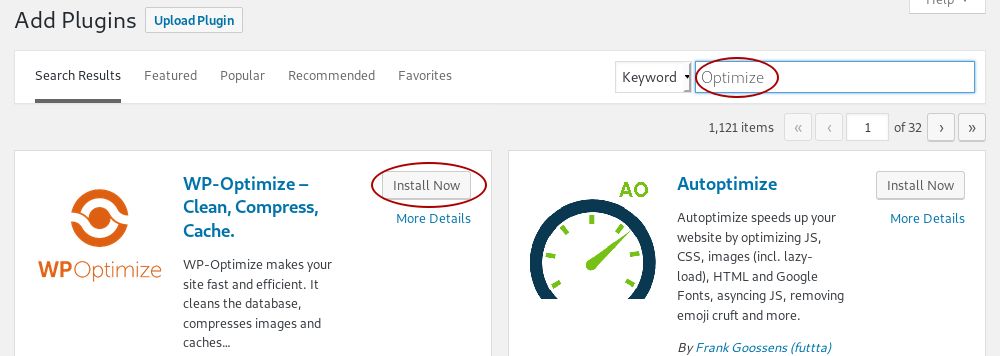
Suppose you want to install the first plugin in the list of plugins it finds with your keywords. Then, press the “Install Now” button. Now, WordPress will download the required file from its server and bring the plugin to your website and complete the installation.
After the installation is completed, the text on the “Install Now” button will be changed to “Activate“.
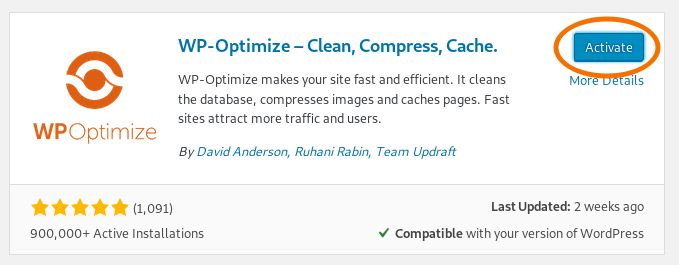
When you press the “Activate” button, WordPress will complete the installation process of this plugin and will show you an Info notification message at the top of the screen.

Phew! That was a huge load of effort!! But, you have activated a WordPress plugin successfully. But, one more thing I need to know! How do I install a premium plugin? Yes, this is also necessary to know and that will be the subject of our next discussion.
Let’s Install a Paid / Premium WordPress Plugin
The installation process of the Premium or Paid Plugin is also a simple matter, it just has to be installed a little differently. Paid plugins cannot be found in the free plugin list of WordPress; These plugins have to be downloaded through paid membership of different companies. Usually, these plugins are available in a .zip file size. Here you can see the .zip file of the paid version of a WordPress plugin.

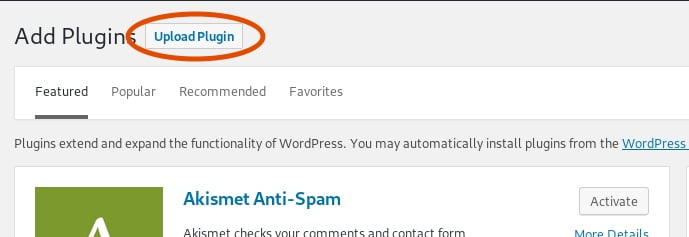
Let’s head straight to the WordPress Dashboard and click on the “Plugins” link from the sidebar menu. You can see the Plugins screen (Fig. 2). Now, click on the “Add New” button (Fig. 2).
Now, you have to click on the “Upload Plugin” button.
The actual plugin upload screen looks like the image below.
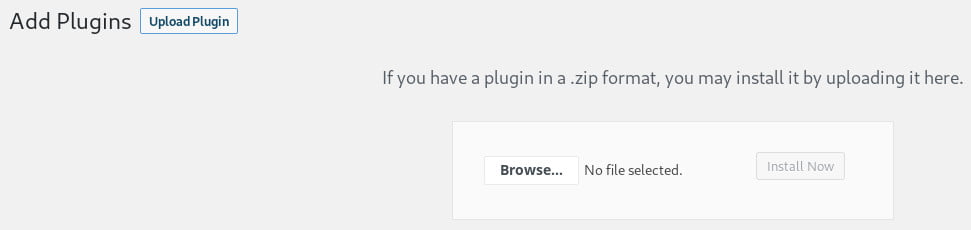
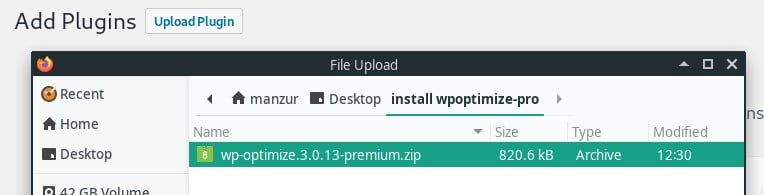
Once you see this form, hit the “Browse…” button which will bring up another modal file select form in which you will pick the .zip file of your premium plugin.
Once you pick the form, the popup screen disappears and returns you back to the previous form. But, this time, you will find a new button, “Install Now“. Pressing this button, WordPress will finish installing your premium plugin.

You will be asked again whether you want to activate the plugin. Yes, this is what you intend to do. Hit the “Activate Plugin” button.
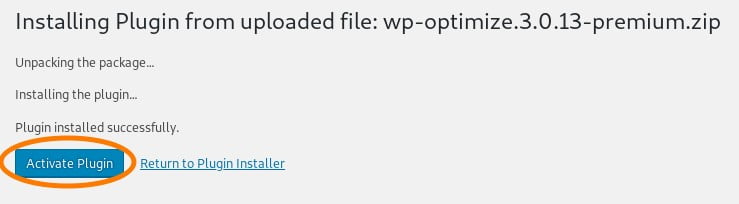
In the end, you should see this message saying that your premium plugin is installed successfully.
This plugin has added new functionality to your WordPress site like any other plugin and it is now ready to serve you something which is definitely going to be useful for you.
Through this guide, we saw how to install a free and premium / paid WordPress plugin. Hopefully, this will be useful for you.
If you like our guide, please, share it on your social network.
Optimize your WordPress site by 50-80%
just by following these Simple Tips.
Essential Tips to Speed Up
Your WordPress Site
Leave Your Comment