LEMP is a gang of four components, i.e.,

Linux (in this case, Ubuntu),

(E)Nginx Web Server,

(M)ySQL Database Server,
PHP / Perl / Python.
This type of web server is mainly used to run PHP-based content management systems, such as WordPress, Joomla, etc., and web applications. It has been gaining popularity since the invention of the Nginx web server in 2011.
For this tutorial, I will use an Ubuntu 20.04 Virtual Private Server (VPS) server where Ubuntu 20.04 was pre-installed. We will install Nginx, MySQL, and PHP one by one on this VPS server.
Finally, I will show you how to install phpMyAdmin alongside LEMP on this server for administering MariaDB/MySQL database server.
Prerequisites
In this tutorial, I used an Ubuntu 20.04-based VPS which I bought from RamNode. You may install it on a VirtualBox and use it.
I assume you have access to:
- a username that has a sudo privilege to use on this server and have the ufw firewall installed and configured.
- The IP address of the server

Install Nginx Web Server
First, you should update the local package index. This is the recommended practice. You can then install Nginx.
sudo apt update
sudo apt install nginx
After installation, the Nginx service should be running by default.
To check if the Nginx service is already running, open the Terminal and run the following command:
sudo systemctl status nginx
Sample Output:
● nginx.service - A high performance web server and a reverse proxy server
     Loaded: loaded (/lib/systemd/system/nginx.service; enabled; vendor preset: enabled)
     Active: active (running) since Fri 2020-05-29 10:13:47 UTC; 56s ago
       Docs: man:nginx(8)
   Main PID: 1349 (nginx)
      Tasks: 2 (limit: 2283)
     Memory: 4.4M
     CGroup: /system.slice/nginx.service
             ├─1349 nginx: master process /usr/sbin/nginx -g daemon on; master_process on;
             └─1350 nginx: worker process

May 29 10:13:46 ubuntuserver systemd[1]: Starting A high performance web server and a reverse proxy server...
May 29 10:13:47 ubuntuserver systemd[1]: Started A high performance web server and a reverse proxy server.
This info message in the Terminal indicates that your Nginx service is running without any issues.
In case the Nginx service is not started yet, you can start it using the command:
sudo systemctl enable nginx
sudo systemctl start nginx
Permit Nginx web server through UFW Firewall
UFW is a straightforward, uncomplicated fireward that comes preinstalled on Ubuntu. After installing Nginx, you must allow Nginx to go through the firewall. Otherwise, your web server will not be able to send page requests to the browser.
You can view which services are currently allowed in UFW with this command:
sudo ufw app list
Sample output:
Available applications:
Nginx Full
Nginx HTTP
Nginx HTTPS
OpenSSH
If you look closely, Nginx has allowed itself in the UFW profiles.
If you inspect the “Nginx Full” profile, you should see that it uses both 80 and 443 ports to pass its request to the browser.
sudo ufw app info "Nginx Full"
Sample output:
Profile: Nginx Full
Title: Web Server (Nginx, HTTP + HTTPS)
Description: Small, but very powerful and efficient web server
Ports:
80,443/tcp
You should run the following command to allow incoming HTTP and HTTPS traffic for this profile:
sudo ufw allow in "Nginx Full"
You should see an output something like the below:
Rules updated
Rules updated (v6)
If you do not want to allow secured traffic via HTTPS protocol (443 port), but rather want to allow HTTP (80) traffic, run this command instead:
sudo ufw app info "Nginx HTTP"
Test Nginx from the browser
Now, you must be excited to see your web server is working. Forgot your server IP? You should already have it.
Open your favorite browser and type the server IP and hit Enter key like this:
http://you_server_ip
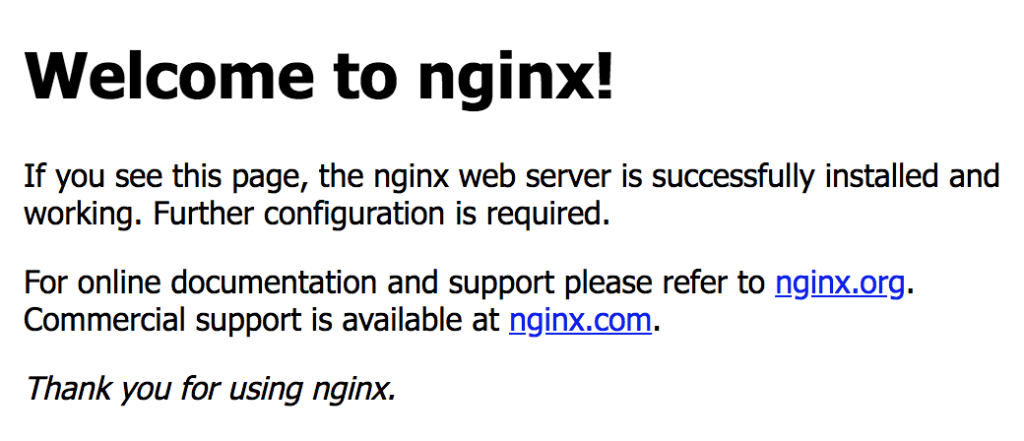
Your browser should display the default web page of Nginx confirming the web server’s correct installation and function.

Install MySQL On Ubuntu
I have MySQL in the second step of the LEMP installation process. A one-line command can be used to start the installation of MySQL on Ubuntu:
sudo apt install mysql-server
or
sudo apt install mariadb-server
When finished, you can check the current status of MySQL service as below:
sudo systemctl status mysql
Sample Output:
● mysql.service - MySQL Community Server
     Loaded: loaded (/lib/systemd/system/mysql.service; enabled; vendor preset: enabled)
     Active: active (running) since Fri 2020-05-29 10:31:56 UTC; 51s ago
   Main PID: 2288 (mysqld)
     Status: "Server is operational"
      Tasks: 39 (limit: 2283)
     Memory: 325.6M
     CGroup: /system.slice/mysql.service
             └─2288 /usr/sbin/mysqld

May 29 10:31:49 ubuntuserver systemd[1]: Starting MySQL Community Server...
May 29 10:31:56 ubuntuserver systemd[1]: Started MySQL Community Server.
Secure MySQL Server and Setup “root” Password
MySQL provides an automated script mysql_secure_installation to set up its security. This script sets up the database server’s “root” password which is “blank” by default, removes “anonymous users” from the database, and takes some other steps to heighten security.
At the first prompt, you will be asked to enter the current database root password. This is not to be confused with the system root.
The database root user is an administrative user with full privileges over the database system.
Because you just installed MySQL and haven’t made any configuration changes yet, this password will be blank, so just press ENTER at the prompt.
Start the script by running the following command:
sudo mysql_secure_installation
This script will ask you to respond to a series of interactive question-answer drives to secure your MySQL database server. MySQL database server has a root user to administer its security settings and other operations relative to database management.
Please do not confuse MySQL’s “root” password with that of Ubuntu’s “root” password. They are totally different things.
The first thing the script asks you to enter the current root password which is blank. Press the “Enter” key as it is blank.
The next prompt asks you to type in a strong root password TWICE for the database server. Use lowercase letters, uppercase letters, numbers, and special characters when creating strong passwords. Pay special attention to this password so that it is long enough, say, at least 8 to 12 characters.
Please set the password for root here.

New password:

Re-enter new password:

Do you wish to continue with the password provided?(Press y|Y for Yes, any other key for No) : y
Once you enter the password twice, the script will walk you through the rest of the steps. Just type Y and hit the ENTER key.
This will remove anonymous users, disallow root user login remotely and remove the test database.
Remove anonymous users? (Press y|Y for Yes, any other key for No) : y
Success.

Normally, root should only be allowed to connect from
'localhost'. This ensures that someone cannot guess at
the root password from the network.

Disallow root login remotely? (Press y|Y for Yes, any other key for No) : y
Success.

By default, MySQL comes with a database named 'test' that
anyone can access. This is also intended only for testing,
and should be removed before moving into a production
environment.

Remove test database and access to it? (Press y|Y for Yes, any other key for No) : y
- Dropping test database...
Success.

- Removing privileges on test database...
Success.

Reloading the privilege tables will ensure that all changes
made so far will take effect immediately.

Reload privilege tables now? (Press y|Y for Yes, any other key for No) : y
Success.

All done!
I have finished the installation of the MySQL server and also secured it from commonly used “exploits” running the supplied script in MySQL.
Creating a database and user
A successful business website may require multiple databases. From the point of view of database security, creating a separate user account for each database is the best security practice. Our MySQL database server is ready. Now, I will show you how to create a database and a user account for it.
Database name: test_data
User: test_user
User Password: dX7@2#{yGz
For this, now I will log in using MySQL root user. I will open the terminal and write the following command:
mysql -u root -p
MySQL will ask you for the root password. Type in the password.
To create a new database, run the following command from your MySQL console:
CREATE DATABASE test_data;
Now, I will create a new user and grant this user full privileges on the newly created database. During the creation of the “user”, I shall set a strong password, zE4%DmX%x.
If you copy the following command, you should change the password to a new strong password.
GRANT ALL ON test_data.* TO 'test_user'@'localhost' IDENTIFIED BY 'zE4%DmX%x' WITH GRANT OPTION;
This command will only allow the new user to work on the test_data database and prevent the user from messing with other databases on my server.
Update the changes using this command:
mysql> FLUSH PRIVILEGES;
Following this, exit the MySQL shell:
exit
I have created a new user and assigned a strong password for it. Now it’s time to test if this user can log in to the MySQL server. So, in the Terminal, type the following command:
mysql -u test_user -p
The -p attribute in this command will ask you to provide the password for the new user when creating the test_user user.
If I provide the username and password correctly, MySQL will let me log in successfully. I shall get a command prompt like the following:

To view a list of existing databases, I shall use this command:
SHOW DATABASES;
This will give me the following output:
Sample output:
+-----------------------+
| Database          |
+-----------------------+
| test_data          |
| information_schema |
+-----------------------+
2 rows in set (0.000 sec)
To exit the MySQL shell, type:
exit
So far, our database management system is installed and up for running.
Up next, I shall prepare PHP to complete the LEMP stack installation.

Install PHP on Ubuntu
The name of most popular programming language is PHP. It is an open-source, flexible, and dynamic scripting language for building dynamic websites and web applications. PHP’s active community support, worldwide, is the focus of its popularity. PHP has numerous libraries, and frameworks.
FPM (FastCGI Process Manager) or PHP-FPM is the key that makes NGINX understand PHP scripts. I shall install both PHP and PHP-FPM. So, I run the following command:
sudo apt install php php-mysql php-fpm
Let PHP finish its installation. Let’s make PHP secure by modifying one line of code in the php.ini file.
To do so, I shall edit the php.ini file using my favorite editor:
sudo vi /etc/php/7.4/fpm/php.ini
Find the following line:
;cgi.fix_pathinfo=1
Uncomment this line by removing the semi-colon (;) and changing its value from 1 to 0 (zero).
cgi.fix_pathinfo=0
Save and close the file. Then, restart the PHP-FPM service to take effect the changes.
sudo systemctl restart php7.4-fpm
I must make sure that the PHP-FPM service is running. To check this service status, I shall use this command:
sudo systemctl status php7.4-fpm
Sample output:
● php7.4-fpm.service - The PHP 7.4 FastCGI Process Manager
<strong>     Loaded: loaded</strong> (/lib/systemd/system/php7.4-fpm.service; enabled; vendor preset: en>
<strong>     Active: active (running)</strong> since Fri 2020-05-29 10:40:45 UTC; 11s ago
       Docs: man:php-fpm7.4(8)
    Process: 10711 ExecStartPost=/usr/lib/php/php-fpm-socket-helper install /run/php/ph>
   Main PID: 10693 (php-fpm7.4)
     Status: "Processes active: 0, idle: 2, Requests: 0, slow: 0, Traffic: 0req/sec"
      Tasks: 3 (limit: 2283)
     Memory: 7.0M
     CGroup: /system.slice/php7.4-fpm.service
             ├─10693 php-fpm: master process (/etc/php/7.4/fpm/php-fpm.conf)
             ├─10709 php-fpm: pool www
             └─10710 php-fpm: pool www

May 29 10:40:44 ubuntuserver systemd[1]: Starting The PHP 7.4 FastCGI Process Manager...
May 29 10:40:45 ubuntuserver systemd[1]: Started The PHP 7.4 FastCGI Process Manager.
Configure Nginx to work with PHP-FPM
Nginx doesn’t understand PHP. We need to explain to Nginx which libraries to use to understand PHP scripts.
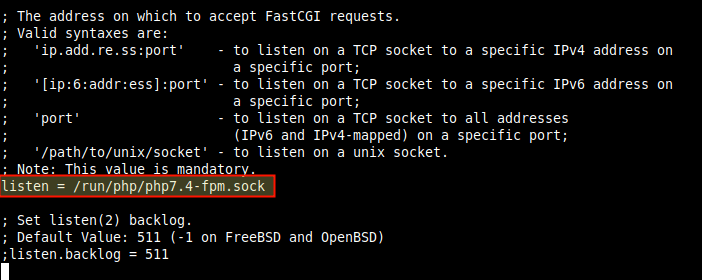
This instruction is written in the /etc/php/7.4/fpm/pool.d/www.conf file.
Any request for a PHP script from the client side to Nginx, in fact, Nginx sends this request directly to this pool configuration file. By default, there is a listen-to parameter that actually points to the path of a UNIX socket, where the PHP script file is made understandable for Nginx.
We will not make any changes here but will look at the path of this UNIX socket and write it in Nginx’s server block.
From now on, if there is a request to Nginx for a PHP script, Nginx will forward these requests to this UNIX socket. This socket will process the PHP script and return it to Nginx in a way that Nginx can understand.
First of all, I am going to take a backup of the default server block configuration file of Nginx and edit the /etc/nginx/sites-available/default file:
cp /etc/nginx/sites-available/default /etc/nginx/sites-available/default.back
sudo vi /etc/nginx/sites-available/default
Find the “Server” section, and set your Ubuntu server’s FQDN or IP address as shown below. I shall also make sure to add the index.php line.
[...]
server {
 listen 80 default_server;
 listen [::]:80 default_server;

[...]

root /var/www/html;

 # Add index.php to the list if you are using PHP
 index index.php index.html index.htm;

 server_name 00.00.00.00;
[...]
You should change 00.00.00.00 with your server’s actual IP address provided by your hosting company.
Dissection of Nginx server block:
| listen 80; | Listen for ipv4. |
| listen [::]:80 default_server; | Listen for ipv6. |
| index.php | Add this to use PHP |
| root /var/www/html; | Nginx document root directory. |
| server_name 00.00.00.00; | Change to your IP address provided by your hosting company. |
Then, scroll down a little bit and find the “#location ~ .php$” section.
Uncomment and modify the following lines as shown below:
location ~ \.php$ {
    include snippets/fastcgi-php.conf;
    #
    # # With php-fpm (or other unix sockets):
    fastcgi_pass unix:/var/run/php/php7.4-fpm.sock;
    # # With php-cgi (or other tcp sockets):
    # fastcgi_pass 127.0.0.1:9000;
}

# deny access to .htaccess files, if Apache's document root
 # concurs with nginx's one
 #
 location ~ /\.ht {
    deny all;
}
Save and exit the file.
Now, run a test for errors on the Nginx configuration file. Use the following command:
sudo nginx -t
Same output:
nginx: the configuration file /etc/nginx/nginx.conf syntax is ok
nginx: configuration file /etc/nginx/nginx.conf test is successful
If no errors are indicated in the status, restart the Nginx server to reload the configuration file and restart the Nginx service. I shall use this command:
sudo systemctl restart nginx
I have hopefully finished the configuration of PHP.
Now, let us test if it is working correctly. I shall now create a PHP file and use PHP’s phpinfo() method to display its current configuration info.
I have created a file called named “info.php” under the Nginx document root folder.
touch /var/www/html/info.php
sudo vi /var/www/html/info.php
Add the following lines:
<?php
phpinfo();
?>
Save and quit the file.
I shall open my web browser and navigate to http://00.00.00.00/info.php (Replace your server’s IP address).
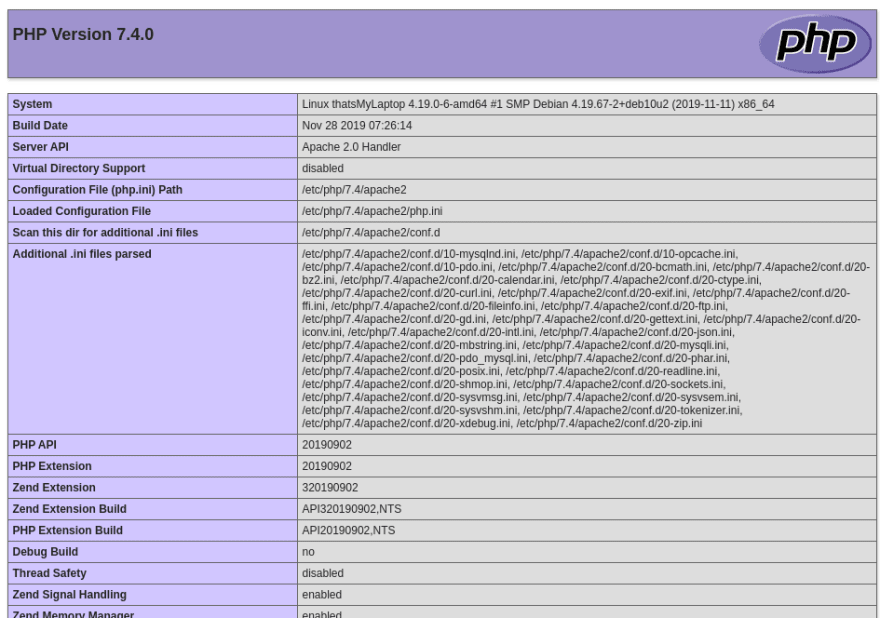
This concludes the installation of PHP 7.4.X on my Linux server.

Install phpMyAdmin On Ubuntu
phpMyAdmin is a free and open-source web-based application developed for administering MySQL / MariaDB database servers. It’s written in PHP. It offers a wealth of features to streamline the tiresome and repetitive tasks of database administration.
sudo apt install phpmyadmin
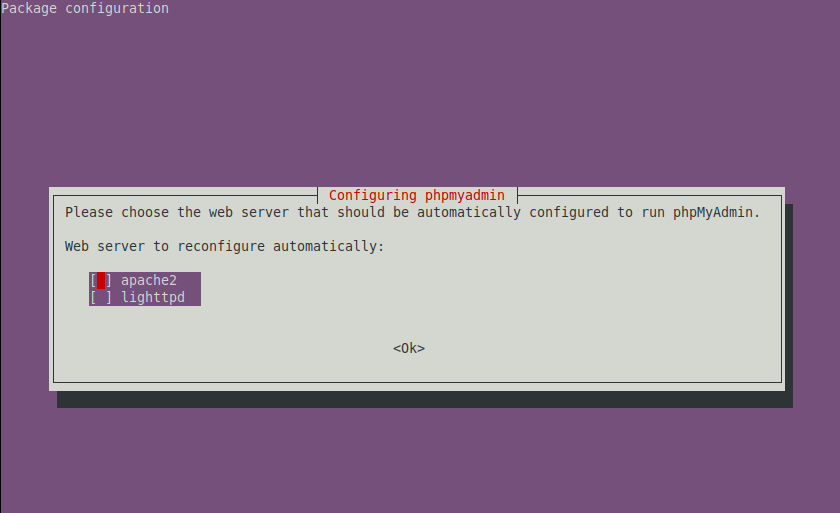
This automated installation process will ask you to configure several features of the phpMyAdmin package.
First, you will be prompted to choose the default web server for running it. Press “Esc” because this screen does not include NGINX server in its list.
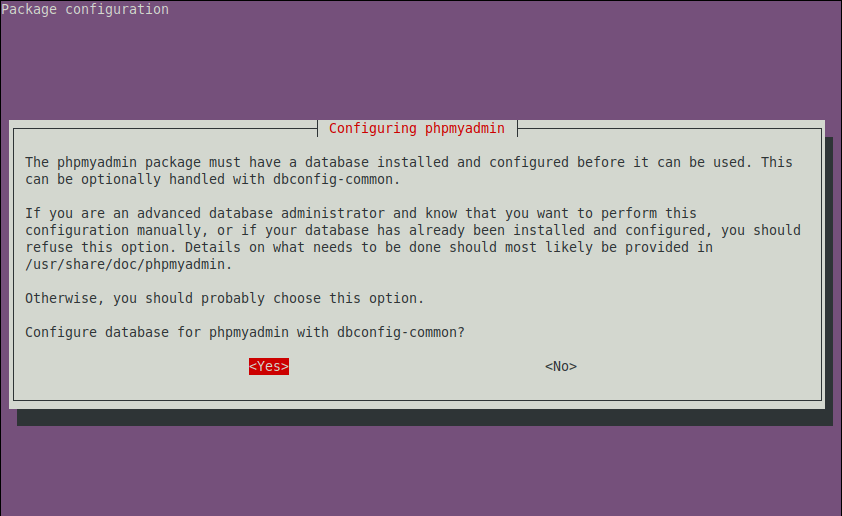
Next, PhpMyAdmin requires a database to work with. In this package configuration prompt, choose Yes to configure a database for phpMyAdmin with the dbconfig-common package.
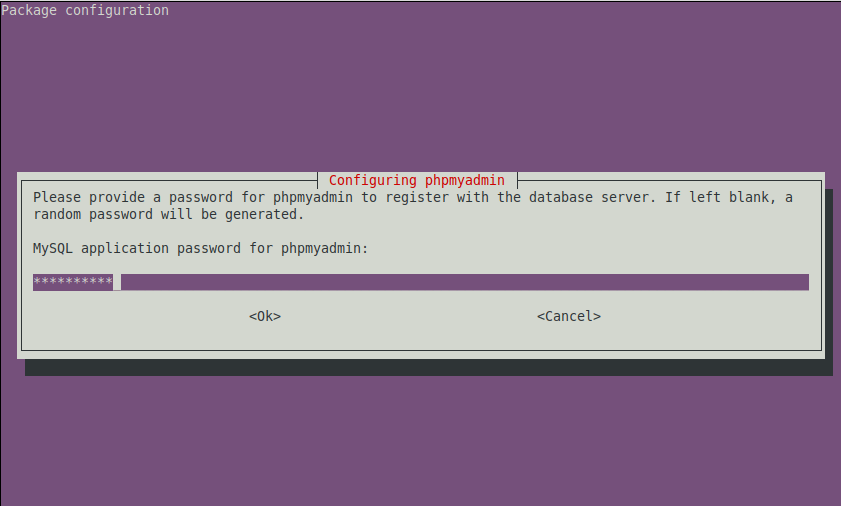
Walking past the “Configuring phpmyadmin” screen, you need to provide a secured password for phpMyAdmin to register with the MySQL database.
Enter a secure password and click “Enter“.
Configuring Nginx to Serve PhpMyAdmin Site
By default, PhpMyAdmin site is installed in /usr/share/phpmyadmin folder. In order to run phpMyadmin run through Nginx, create a symlink for this directory under the document root, then set the correct permissions and ownership on the phpMyAdmin directory as follows.
sudo ln -s  /usr/share/phpmyadmin /var/www/html/phpmyadmin
or,
sudo -u www-data -g www-data ln -s /usr/share/phpmyadmin/ /home/ubuntu/public_html/phpmyadmin

sudo chmod 775 -R /usr/share/phpmyadmin/
sudo chown root:www-data -R /usr/share/phpmyadmin/
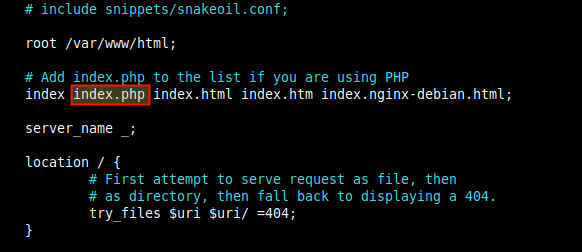
You must make sure that the index directive in the default server block configuration (/etc/nginx/sites-available/default) file includes index.php as shown below:
Let’s Restart the Nginx service for the changes to take effect.
sudo systemctl restart nginx
To access the phpMyAdmin site from your browser, use the following URL:
http://00.00.00.00/phpmyadmin
Or,
http://domain-name/phpmyadmin
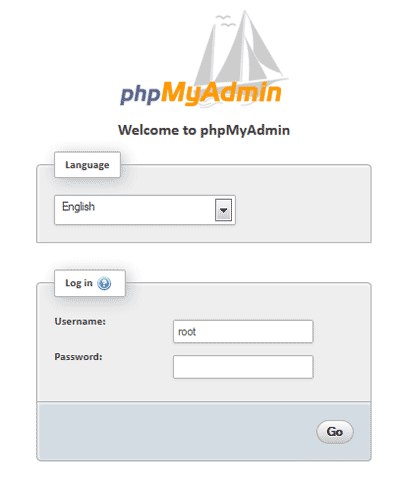
If everything goes right, you should see the default authentication screen of phpMyAdmin asking you for the username and password. Provide the correct credential of the test user we created in the earlier section of this tutorial. After successful authentication, you will be redirected to the database administration page of phpMyAdmin.
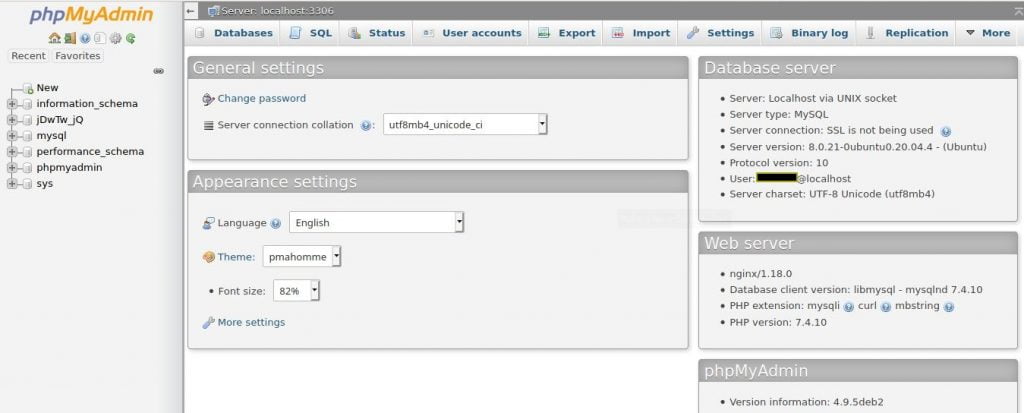
From now on, you can manage your databases via the phpMyAdmin web interface.
Secure phpMyAdmin: Password-protect Login page
There are several steps involved in security phpMyAdmin. In this tutorial, I am going to add an extra layer of security by restricting access to the default login page of phpMyAdmin with a basic HTTP authentication method.
Whoever attempts to access the phpMyAdmin login page, he/she will be asked to provide an additional username and password combination before accessing the actual phpMyAdmin login page.
First, we need to generate a password file using htpasswd utility. The htpasswd utility is part of the apache2-utils package. So let us install it using the command:
sudo apt install apache2-utils
Now, create an encrypted password file with the command:
sudo htpasswd -c /etc/nginx/.htpasswd username
You should replace “username” with an actual username of your liking. Enter a strong password twice to generate the password file.
Next, I am going to write the path of the above-mentioned password file in the Nginx default configuration file in /etc/nginx/sites-available/default.
Edit the default Nginx config file:
sudo vi /etc/nginx/sites-available/default
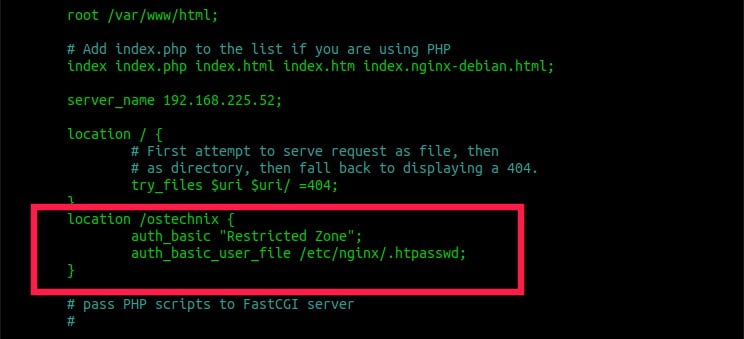
Add the following lines, under the “location” block:
[…]
location /phpmyadmin {
    auth_basic "Restricted Zone";
    auth_basic_user_file /etc/nginx/.htpasswd;
    }
[…]
Check the Nginx configuration file for any syntax errors using this command:
sudo nginx -t
Sample output:
nginx: the configuration file /etc/nginx/nginx.conf syntax is ok
nginx: configuration file /etc/nginx/nginx.conf test is successful
If there are no errors reported by Nginx, restart nginx service to take effect of the changes.
sudo systemctl restart nginx
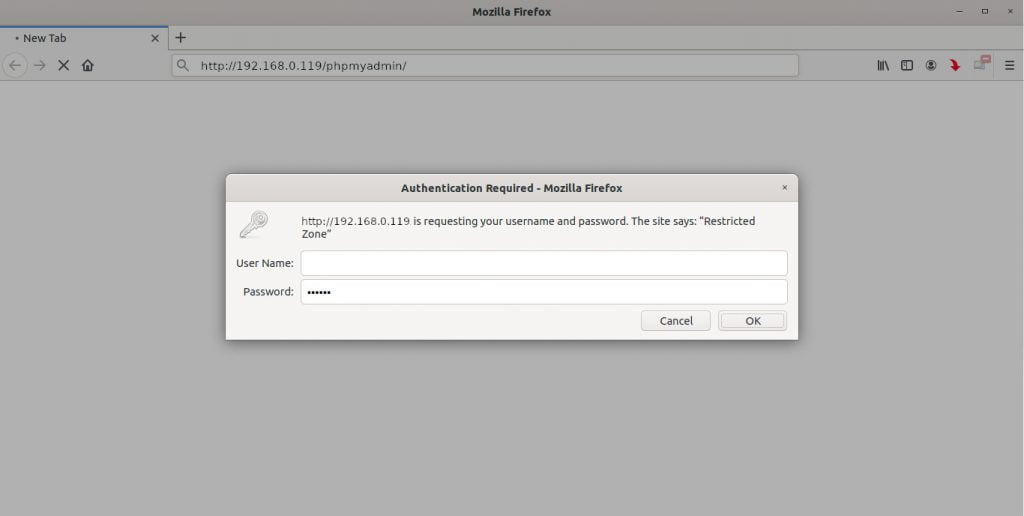
Now, if I try to access your phpMyAdmin URL from my browser, I will be prompted to enter a username and password:
Wrapping it Up
In this tutorial, I have shown you how to install the LEMP stack with Ubuntu 20.04 operating system. When a shared hosting server does not work for a business, a custom server configuration is required.
For applications created by Node.js and ReactJS, different types of technology have to be installed on the server.
Our LEMP stack-based server can basically work with PHP-based applications that will use the database with a PHP-based application.
I hope this tutorial on installing this LEMP stack will be useful for your professional work. Then I think my attempt to create this tutorial will be successful.
Leave Your Comment