
SSH is a very secure way to connect to your Virtual Private Server (VPS). Each time, we connect to the VPS, we provide a username and password for authentication. But, we can avoid it boresome task. We can establish a password-less secured connection to our VPS using SSH.
This tutorial is an attempt to show you how we can go passwordless using SSH.
How to Generate SSH Keys on Windows using PuTTY Download
In the Windows environment, we generally use PuTTY to generate SSH keys. PuTTY is a free SSH and TelNet client for Windows OS.
PuTTYgen is a key generator tool for creating pairs of public and private SSH keys. It is one of the components of the open-source networking client PuTTY. Although originally written for Microsoft Windows operating system, it is now officially available for multiple operating systems including macOS, and Linux. PuTTYgen.exe is a graphical tool on Windows OS. While on the other side, Linux OS has the only command-line version that could be accessible using SSH commands.
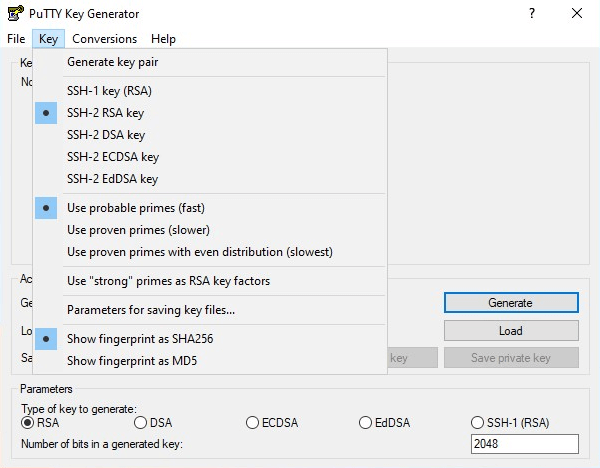
Run the PuTTYgen.exe app. From the Key menu, choose “SSH-2 RSA key“. You need to press the Generate button to let the app generate the necessary private and public keys.
Be sure to Save your private key!
If you’re using PuTTY, you’ll need to specify the private key when you’re logging in, as follows:
- In the PuTTY connection configuration screen, expand Connection -> SSH -> Auth
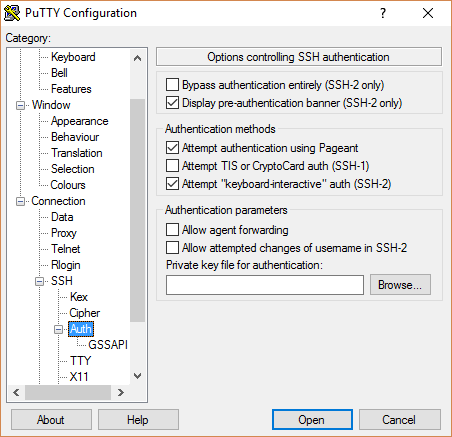
- Click the Browse button, and select your previously-created private key
- Return to the Session Category. Name and save the session for easy future access.
- Try to log in to your VPS now that your SSH key has been configured.
How to Generate SSH Keys on Mac OS X & Linux
How to Generate SSH Keys on Mac OS X & Linux
- From your macOS / Linux OS, launch the Terminal app.
- Enter the following code and press enter:
ssh-keygen -t rsa
- Press ENTER to store the key in the default folder /Users/Username/.ssh/id_rsa).
- Type a passphrase (Note: Characters you type in will not appear in the Terminal).
- Confirm your passphrase to finish SSH Keygen.
You should get an output that looks something like this:
Your identification has been saved in /Users/myname/.ssh/id_rsa.
Your public key has been saved in /Users/myname/.ssh/id_rsa.pub.
The key fingerprint is:
ae:89:72:0b:85:da:5a:f4:7c:1f:c2:43:fd:c6:44:30 [email protected]
The key's randomart image is:
+--[ RSA 2048]----+
|                 |
|         .       |
|        E .      |
|   .   . o       |
|  o . . S .      |
| + + o . +       |
|. + o = o +      |
| o...o * o       |
|.  oo.o .        |
+-----------------+
- Copy your public SSH Key to your clipboard using the following code:
pbcopy < ~/.ssh/id_rsa.pub
- Use Ctrl+V or Right-click and paste to paste your public SSH Key where it needs to go!
- Login to your VPS now that your SSH key has been configured.
Leave Your Comment